Ebla Diagram 
Overview
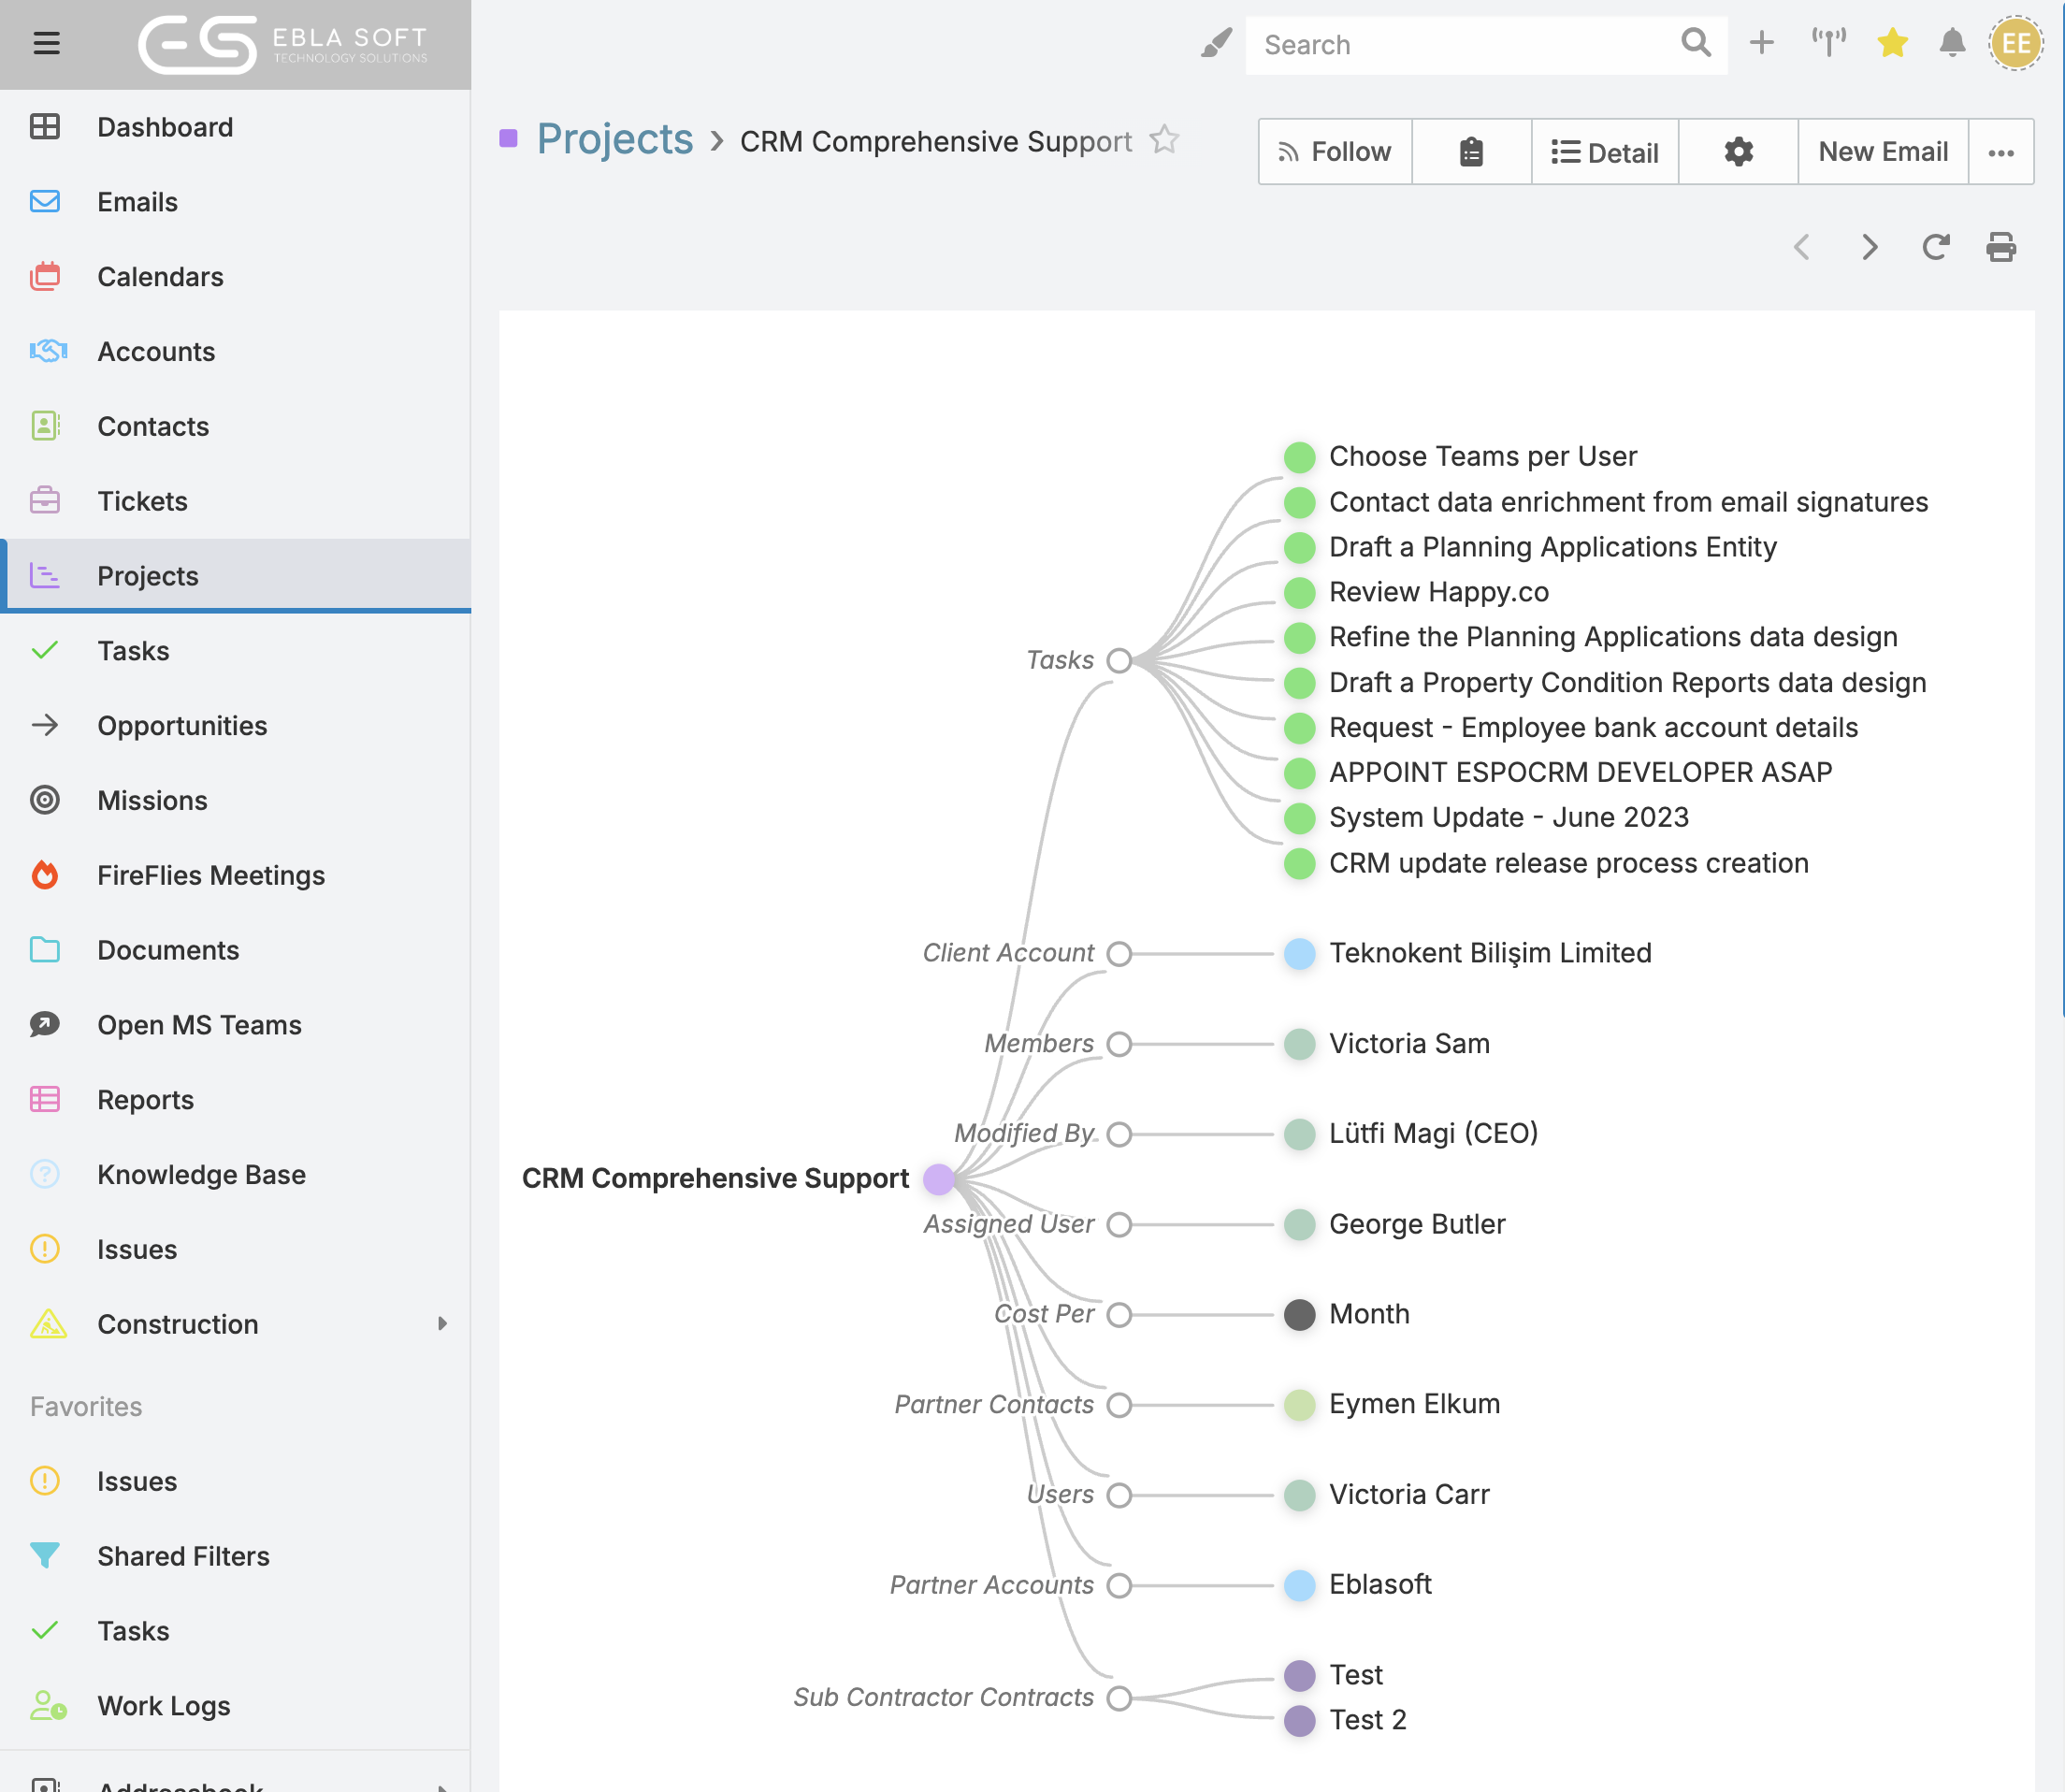
Ebla Diagram adds a Diagram mode to record detail pages so users can understand configured relationship paths visually.
From a record, users can switch between Detail and Diagram and review a pre-expanded relationship tree defined by the administrator.
What users can do
- Open relationship diagrams from supported record detail views.
- See only the relationship paths configured by the administrator.
- Review all configured branches already expanded when the diagram opens.
- Pan and zoom the diagram.
- Change layout direction, including radial mode, for readability.
- Open related data directly from diagram nodes.
- Print the current diagram.
Quick Start
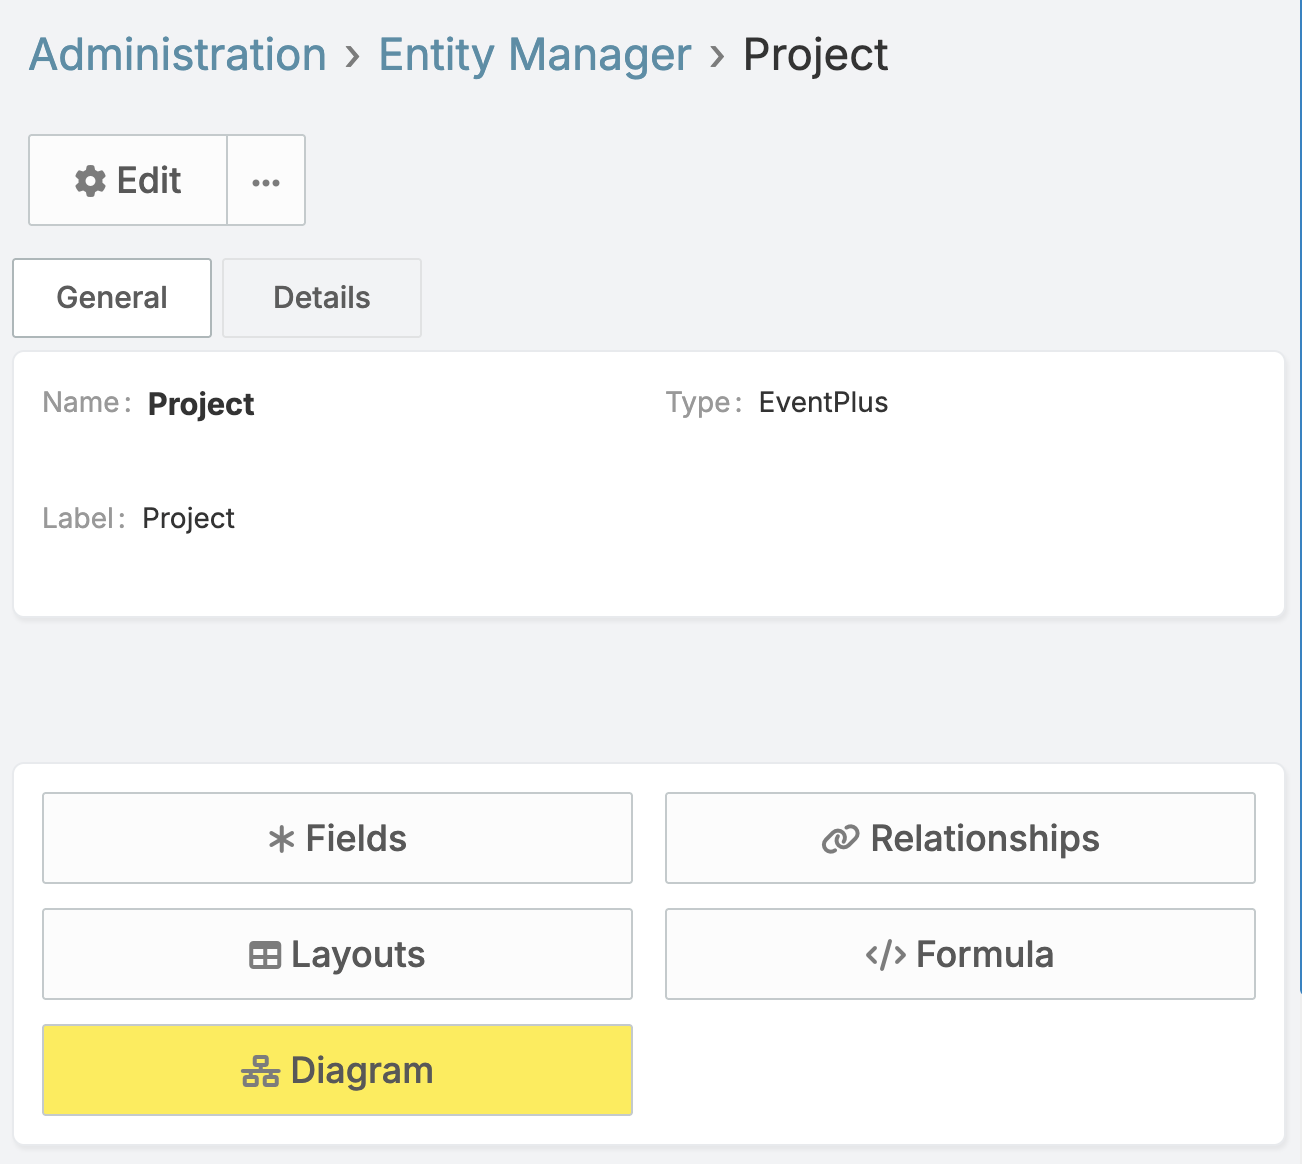
- Go to Administration → Entity Manager → {Entity} → Diagram.
- Enable diagram mode for the entity and save.
- Open a record and click Diagram in the top-right actions.
Configure Diagram
Open the settings page
- Go to Administration → Entity Manager.
- Open the entity you want to configure.
- Click Diagram.
Settings
Diagram Enabled
Turn this on to allow Diagram mode for the entity.
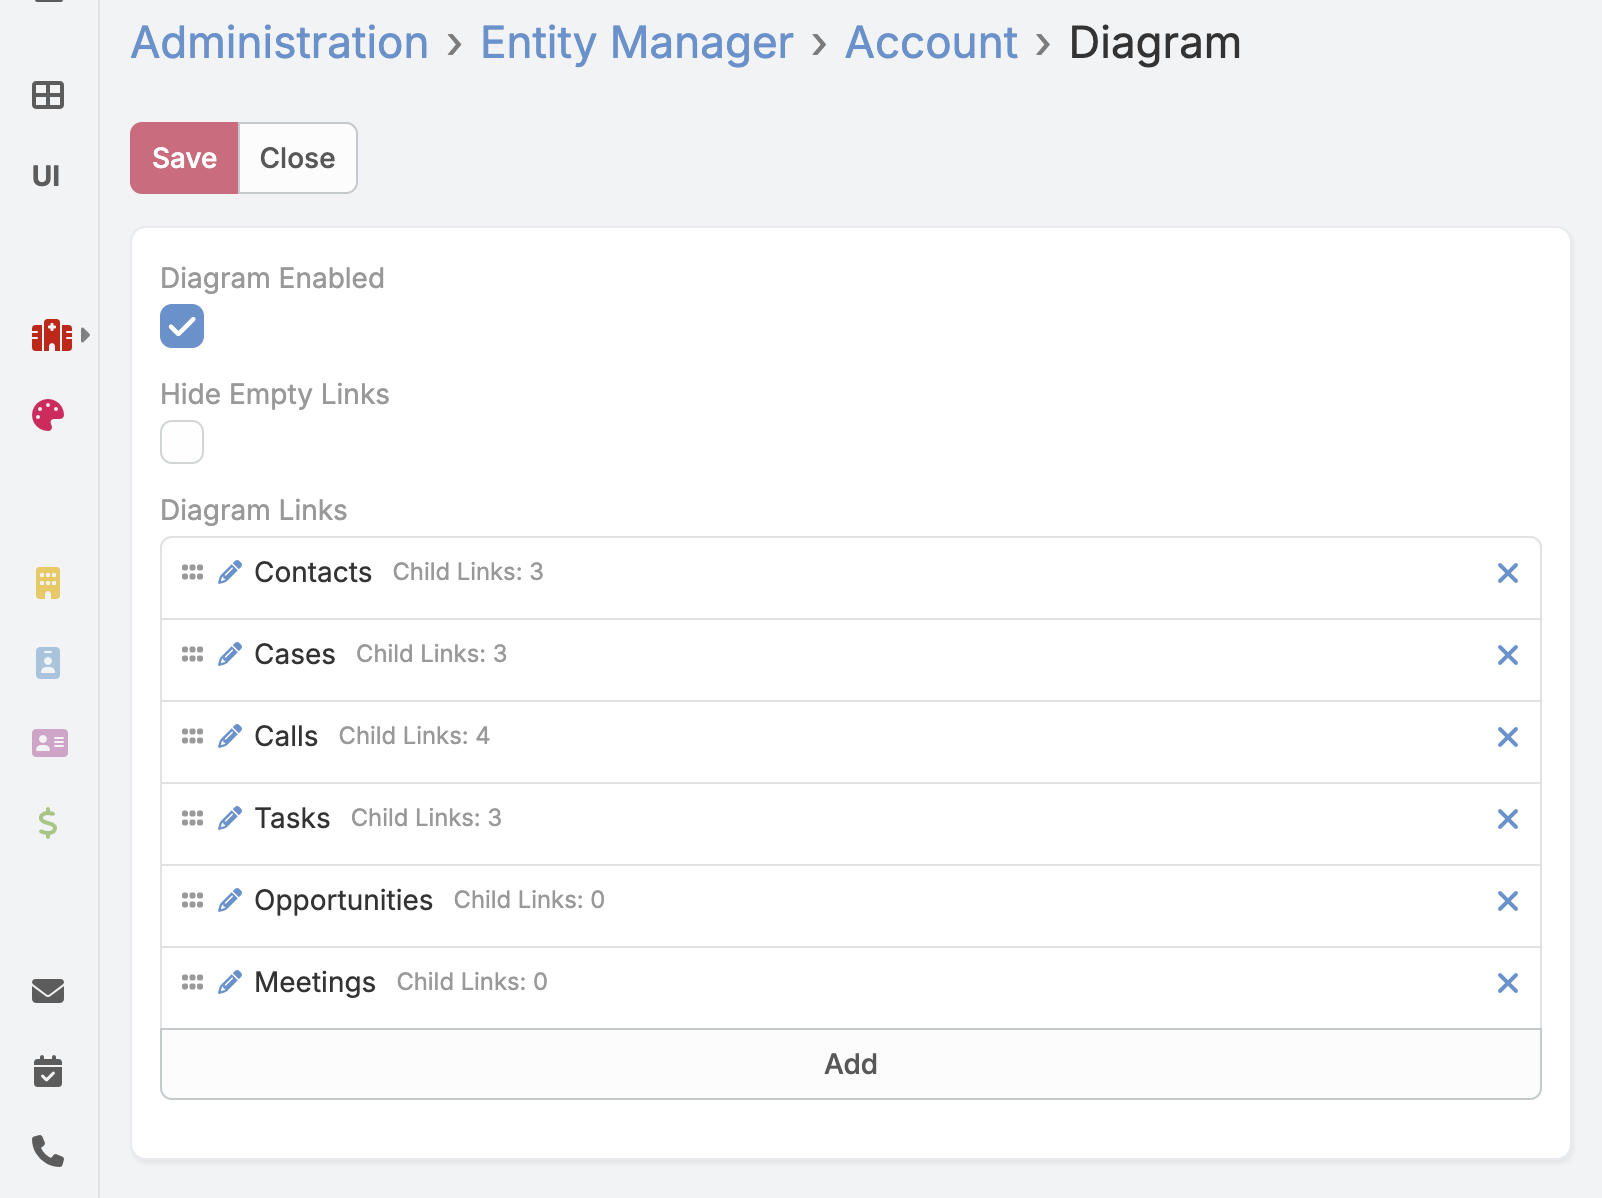
Diagram Links
Choose the exact relationship paths to show in the diagram.
Examples:
Company → Offices → EmployeesCompany → Owners
Only the selected links are rendered. Administrators can choose whether empty links are hidden or shown as (empty) placeholders.
Recommended setup
- Enable diagram mode for key entities first.
- Start with a small set of meaningful relationship paths.
- Add second- and third-level links only where they help analysis.
- Save and test with real records.
Permission note
Only administrators can save Diagram settings from Entity Manager.
Use Diagram View
Open Diagram mode
- Open a record where diagram mode is enabled.
- Click Diagram from record actions.
- Click Detail any time to return to standard detail view.
Understanding the diagram
The diagram renders as a hierarchical tree starting from the current record:
- Coloured circles — record nodes (an actual entity record)
- Hollow circles — relationship nodes (a link to a set of related records)
- Curved lines — show the direction of relationships
The default direction is left-to-right (LR).
For LR, RL, TB, and BT, spacing follows a deterministic tree layout so level gaps stay consistent across direction changes.
Your last selected direction is remembered per entity in your browser, so for example Account and Contact can keep different preferred directions.
Node actions:
- Clicking a record node opens that record in a modal detail view.
- Clicking a link node opens a modal related-list for that relationship.
- Empty link placeholders use a dashed outline for quick visual identification.
Visual style (node colours and text sizing) stays consistent across all directions.
Pan and zoom
- Drag the background to pan around.
- Scroll (or pinch on touch) to zoom in and out.
Toolbar actions
Change Direction
Cycle through five orientations to improve readability:
| Direction | Description |
|---|---|
| LR (default) | Left → Right |
| RL | Right → Left |
| TB | Top → Bottom |
| BT | Bottom → Top |
| RADIAL | Circular radial tree |
Print
Print the current diagram state as an image snapshot.
Tips
- Start with records that have meaningful related data.
- If the graph is too dense, ask your admin to reduce the configured link paths.
- Use direction switching (including RADIAL) when labels overlap.
- Return to Detail mode for editing fields.
FAQ and Limitations
Why do I not see the Diagram button?
Diagram mode is likely disabled for that entity. Ask an administrator to enable it in Entity Manager → Diagram.
Why are some links missing from the graph?
Only the links explicitly configured in Diagram settings are shown.
Why is the graph crowded?
Ask your administrator to reduce the configured relationship paths or remove unnecessary deeper levels.
Can users edit settings?
No. Diagram settings are managed by administrators.
Does it work for every relation type?
The diagram supports configured links based on supported entity relationships. notes and emails are always hidden by design.